Paint

Knowing the painters were working overtime this weekend doing their part to help us make our deadline we headed to midtown today to check things out.  We’ve have heard from numerous people that grays can be risky.  What a relief when Sharon let out “woo, woo”.  After agonizing over selection and with lingering uncertainty even after painting ginormous swaths, that reaction was music to my ears.  Pictures won’t do it justice but here we go anyway.

What's a post about paint without a picture of one of our painters.  These guys have worked the last 2 weekends.  Props.

What’s a post about paint without a picture of one of our painters. These guys have worked the last 2 weekends. Props.

"Moonshine" gray.  Trust me this looks so good in person.

“Moonshine” gray. Trust me this looks so good in person.

We chose a darker gray for the dining room and library.  Again, you gotta see it in person.

We chose a darker gray for the dining room and library. Again, you gotta see it in person.

Another shot of the dining room.

Another shot of the dining room.

Flooring work also in progress.  Charlie doing ground level inspection.  Sanding scheduled to begin Tuesday.

Flooring work also in progress. Charlie doing ground level inspection. Sanding scheduled to begin Tuesday.

Bedroom flooring.

Bedroom flooring.

Tile and more

Tile work has begun and painting of the finished carpentry is nearing completion.  With about 3 1/2 weeks to go the schedule is very tight.  Will we make it to our move date of May 7th?  Stay tuned.

Master bath shower.  Lower niche is for Kaitlin.

Master bath shower. Lower niche is for Kaitlin.

Deco strip

Deco strip

2nd bedroom shower.  Again, notice the lower niche for Kaitlin

2nd bedroom shower. Again, notice the lower niche for Kaitlin

Kitchen cabinet painting is done

Kitchen cabinet painting is done

Finish carpentry and interior paint

The finish carpentry is looking awesome.  I talked to the carpenter – I think Andrew is his name – last week and when he painstakingly pointed out detail after detail I thought to myself, “this guy is speaking my language.”  I think the pictures will attest to that.  Interior painting has started as well with the first phase of trim and cabinetry.  That too is looking spectacular.  We’re a little concerned that the window restoration expert – Loren – hasn’t finished his work yet while painting is in progress. Four weeks left till moving day.  Oy.  While we’re making progress it doesn’t seem like we’ll have a completely finished product then.  Give me a tent and some running water and I’ll be fine.  Sharon on the other hand….

Kitchen entry archway

Kitchen entry archway

Breakfast nook

Breakfast nook

IMG_2396

Second floor windows.  We love how the carpenter tied 3 separate windows together on the north wall to look like 1

Second floor windows. We love how the carpenter tied 3 separate windows together on the north wall to look like 1

Cabinet frieze transition to the archway.  Love it.

Cabinet frieze transition to the archway. Love it.

Pile of baseboards.  Still a long way to go on the finish carpentry.

Pile of baseboards. Still a long way to go on the finish carpentry.

Cabinets, paint and more

After months of pouring money into things you can’t see, we are now onto the phases of renovation that you can see and make it all worth while.  Cabinets went in yesterday and they look fantastic.  We went back and forth with our contractor and cabinet designer on the diner style breakfast booth.  We kept insisting on it, they kept advising against it as it encroached on cabinet space.  We’re glad we won.  The booth is looking fantastic and we’ll get some of the lost storage space back with long (really long) drawers under each seat.  We also selected interior paint colors.  Cabinets will wrap up this week and painting will start next week so come back for an update.

Sharon painting samples.  I think we tried out about 8 lighter grays and 4 darker grays.

Sharon painting samples. I think we tried out about 8 lighter grays and 4 darker grays.

5 panel doors.  Sharon did some research showing that this was a popular style in the early 1900's.

5 panel doors. Sharon did some research showing that this was a popular style in the early 1900’s.

Shelving framing the fireplace.

Shelving framing the fireplace.

Sharon anxiously awaiting her functional gourmet kitchen.  Check out the farm-style sink.  Awesome.

Sharon anxiously awaiting her functional gourmet kitchen. Check out the farm-style sink. Awesome.

Diner style booth.  This will be competing with the library as my favorite place in the house.

Diner style booth. This will be competing with the library as my favorite place in the house.

Kitchen view into the dining room

Kitchen view into the dining room

Would have loved a custom stainless steel hood.  But, holy crap, the price!  This looks just fine.

Would have loved a custom stainless steel hood. But, holy crap, the price! This looks just fine.

Lazy Susan's are outdated.  Check out the design of this storage.  Cool.

Lazy Susan’s are outdated. Check out the design of this storage. Cool.

Drywall

While electrical presents progress it is not visual enough to provide the appearance of substantial progress.  The same thing goes for structural work and plumbing and home automation and insulation and…  Ironically, when you cover up all that progress with drywall, well that’s another thing. Now we have the appearance of substantial progress; rooms are now actual rooms.  With these pictures you can begin to see the vision of each room finally taking shape.

Living room

Living room and front entry

Living room and front entry

Media room. Ceiling still needs coping.

Kitchen and breakfast nook

Kitchen and breakfast nook

2nd floor dormer window

2nd floor dormer area

2nd floor room

2nd floor bedroom

Too nice a day so I couldn't resist an outside shot

Too nice a day to resist and outside shot

Reminiscing demo days

A sledge hammer easily dispatches a counter-top. A well-placed kick smoothly topples a wall. We’ve all seen how seemingly easy and efficient demolition is with the endless parade of home improvement shows. Think HGTV’s Rehab Addict or Property Brothers. And yes, those initial steps can be exhilarating but once that euphoria wears off it is a tedious and tiresome process.  Sharon and I had help – thanks Bob and Tristen and crew, thanks Hayley, thanks Kaitlin and thanks Sophie.  But at the end of the day, in spite of the huge assist, Sharon and I were still faced with the task of pulling hundreds of feet of wood laminate and the thousands of flooring nails that go with it, pealing layers upon layers of wallpaper from literally every room and , scrapping and sanding those windows.  With the demo phase long behind us we must be feeling a bit of nostalgia for those demo days past as we have now decided to tackle the upstairs bathroom.

This picture of the 2nd floor demo does a nice job of capture the scope.

This picture of the 2nd floor does a nice job of capturing the scope of demolition.

Kitchen crashers

Kitchen crashers

Hayley in full demo gear

Hayley in full demo gear

Kaitlin removing wood paneling to save for her future home.

Kaitlin removing wood paneling to save for her future home.

Piling on

Piling on

Removing the laminate flooring.  This was the room we first "discovered" the original hardwood.

Removing the laminate flooring. This was the room we first “discovered” the original hardwood.

Removing the wood laminate nails from the original hardwood.  Sharon spent so many hours doing this I'm pretty sure she dreamt about it.

Removing the wood laminate nails from the original hardwood. Sharon spent so many hours doing this I’m pretty sure she dreamt about it.

Taking shape

With the structural repairs out of the way we are finally beginning to see our vision take shape.  So, time to let the butt-ugly dormer give way to a historically accurate dormer, time to expand the footprint and bring in more natural light to the tiny and dark circa 1915 kitchen and, time to bring  some character to the flat front elevation.

Finally, the shed-style dormer gives way to a gable-style dormer with cottage accents.

Finally, the shed-style dormer gives way to a gable-style dormer with cottage accents.  Notice also that the front door and overhang has been pushed forward 2′ to add  an entry area.

Dormer details

Dormer details

Let there be light.  Side and back windows in added to the expanded footprint of the kitchen.

Let there be light. Side and back windows added to the expanded footprint of the kitchen.

New stairway leading to the upstairs room.  4" wider to make code.

New stairway leading to the upstairs room. 4″ wider to make code.  Woohoo.

IMG_2301

Structural changes

When Sharon and I embarked on this project we thought we did so with our eyes wide open. Numerous walkthroughs with contractors and architects helped convince us that the “bones” of the house were solid and as a result, surprises would be kept to a minimum.  And for the main floor of the house this has turned out to largely hold true.

I think a good contractor is someone who communicates well, is a strong listener, has good relationships with subcontractors and can use those relationships to develop creative solutions. Maria, our wonderful contractor has all of these skills and they would come in handy when she placed the dreaded “we have things to talk about” call to Sharon.  Turns out the previous owner did not add adequate structural support to the finished attic and Maria’s guys discovered this while doing unrelated work in that room. What ensued was a true test of our commitment to this project.

In our case the test was a walkthrough with Maria, our highly creative architect and future neighbor Eric, Pat the lead framer and, a structural engineer whose name I have since forgotten as my memory is clouded by dollar signs every time he spoke.  The wide ranging discussion covered the technical and costly nature of items such as floor joists, collar ties, girders, headers and other items I am surely forgetting.  A veritable litany of structural changes required to bring the second floor up to code. Depending on your perspective, we passed the test as we approved all the changes.  From a timeline perspective, this has set the project back ~3 months given the delays for approval and the work itself.  I suppose that’s why you haven’t seen a post from me in months as honestly, there was no progress to share.  Well now, as the picture below attest, there is progress.

We needed this header to support new joist in the living room ceiling.  Notice the posts on either side.  Those are tied into new girders in the crawl space.

We needed this header to support new joists in the living room ceiling. Notice the posts on either side. Those are tied into new girders in the crawl space.

Here you can see the extent of floor joist work required running across the length of the living room ceiling

Here you can see the extent of floor joist work required running across the length of the living room ceiling

This shot captures the extent of the structural work required in the living room ceiling.

Window and door headers required to support the new floor joists.

Massive floor joist spanning the length of the media and dining rooms

Massive floor joist spanning the length of the media and dining rooms

The Upstairs

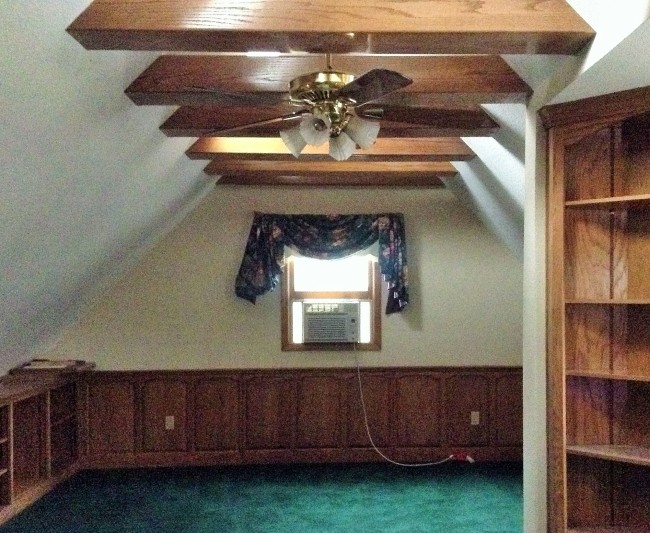
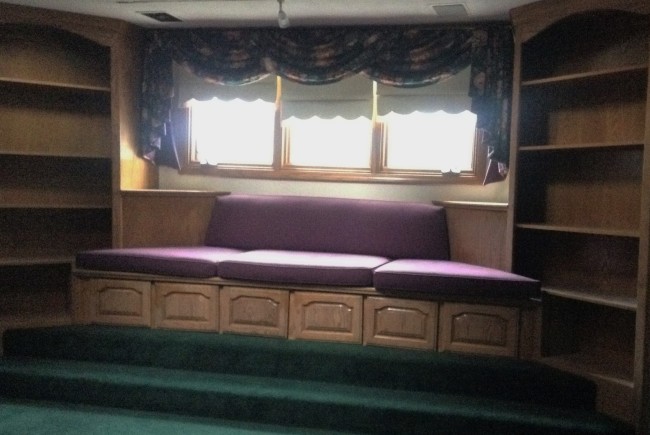
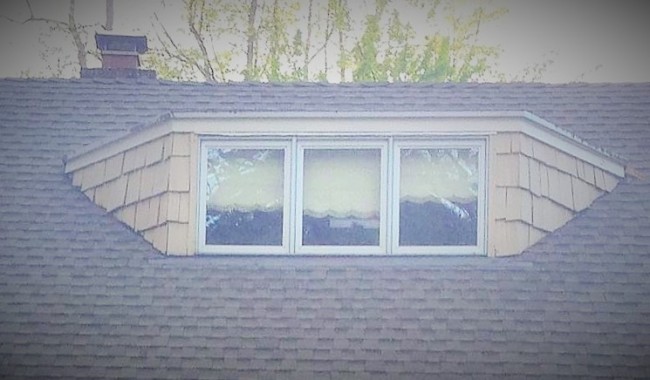
What happens when 1915 English cottage architecture meets the 1970’s appetite for dark oak, darker carpet, polished brass and questionable architectural choices?  You get our upstairs bedroom and bathroom.   Those who have had a chance to see this room have been left either speechless or drawing comparisons to their parents panel walled attics or, worse yet, disco era hangouts.  As if to add an exclamation point, the room’s design choices are made apparent to passersby with the hideous, incongruous dormer window. Thankfully, this spacious room has plenty of potential.  Our plans are to convert it into a room for our girls during extended stays.  And yes, rework the dormer window.

ImageImage


Image

The Windows

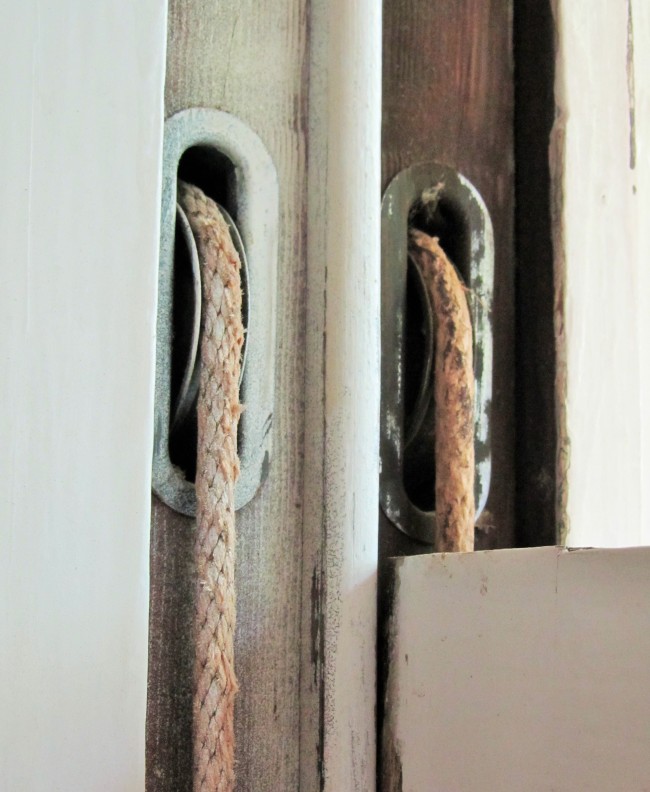
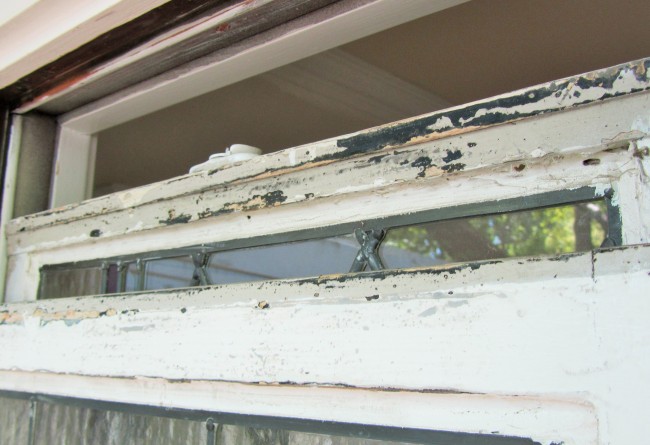
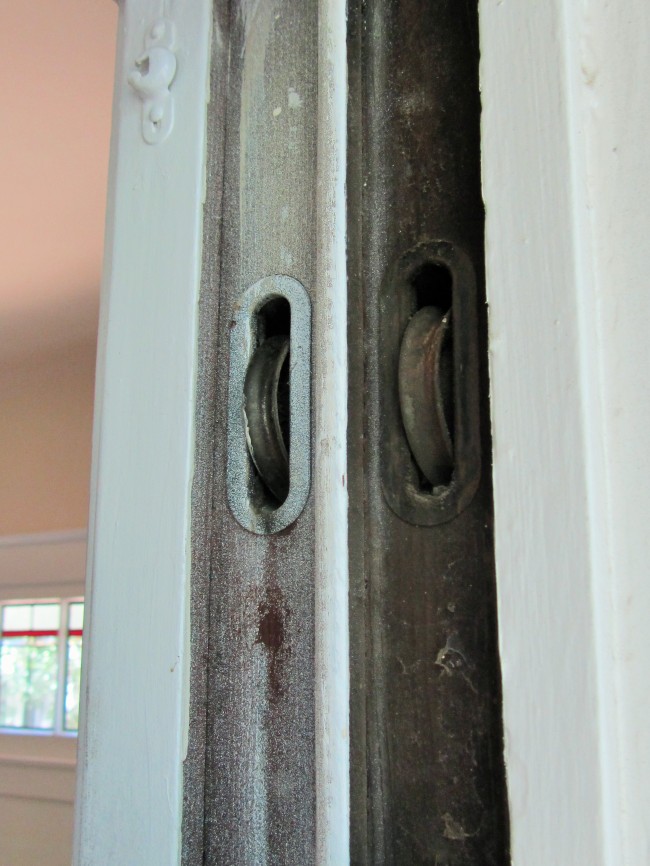
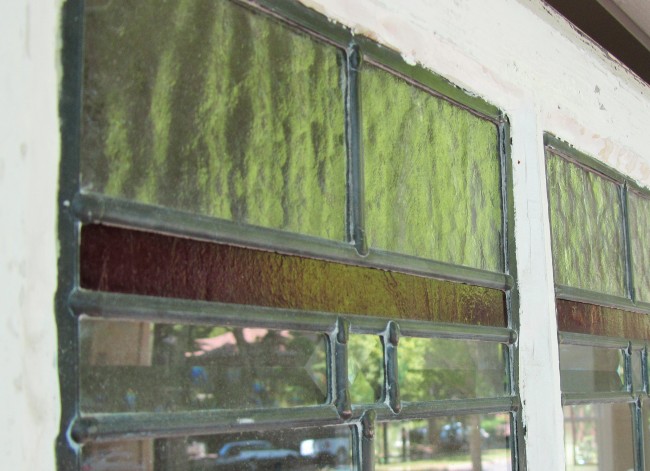
Let’s take a pause in our room by room tour and focus on the windows for a minute.  The windows are one of the key historical elements of the home and add a unifying theme throughout.  At the same time, they somehow manage to add a unique character to each room.   When Sharon, Hayley and I first visited the house we were absolutely taken aback by the windows.  They are original, double hung, leaded glass and there’s lots of them.  That’s the good news.  The bad news?  Where to begin?  There is so much work to be done – get them to open (about 90% there), sanding (I think I’ve counted somewhere between 5-7 layers of paint), get pulleys to work smoothly, replace missing sash cords (no wonder even after working some windows free they are still difficult to open) and I’m sure much more to come.  I’ll stop complaining.  I have to admit I’m kind of geeking out on learning window anatomy and developing a new craft.  Here’s some pictures to give you an appreciation of the work ahead but better yet, the potential.

ImageImageImageImage